Password Protection
Lock your entire docs site or just a handful of pages behind a shared password. Visitors get an unlock screen; the rest of your docs stay open.
Sometimes you want your documentation online, discoverable, versioned in Git, but not visible to the world. Runbooks, pre-release guides, partner-only docs, early-access features. Password protection gives you a single shared passphrase that gates either your whole site or a specific set of pages, without moving anything out of your existing repo.
You'll need a Jamdesk project connected to a Git repository before you can turn on password protection. Configuration lives in docs.json, so password protection piggybacks on your normal build-and-deploy flow.
Which mode should I pick?
Jamdesk has two modes for password protection. Pick one based on what's public and what isn't.
| Whole-site mode | Specific-pages mode | |
|---|---|---|
| Use when | Everything is private: internal engineering docs, a staging copy of your public site, an unreleased product. | Most docs are public. You just need to hide a handful of pages (a runbook, a beta feature, an internal API reference). |
| How you turn it on | Set auth.password.enabled: true in docs.json. | Mark pages private with private: true in frontmatter, or list paths under auth.password.private[]. |
| Public exceptions | Yes: mark individual pages, nav groups, or glob patterns as public. | N/A. Every page is public unless you mark it private. |
Both modes share the same dashboard card, the same unlock screen, and the same rotation and revoke controls. You can switch between them at any time by editing docs.json and pushing.
Protect your whole site
Open your docs.json and declare whole-site protection. The hint field is optional but strongly recommended, since it's the only on-screen clue your readers get about how to obtain the password.
{
  "$schema": "https://jamdesk.com/docs.json",
  "name": "Acme Docs",
  "theme": "jam",
  "auth": {
    "password": {
      "enabled": true,
      "hint": "Ask #docs-access on Slack"
    }
  }
}
Hints are plain text, max 200 characters, no HTML.
Don't put the password itself in docs.json. You set the password in the dashboard after the build. Your repo only contains the opt-in flag and an optional hint.
Push the change to your configured branch. Jamdesk runs a build, and during the build it activates password protection in whole-site mode.
git add docs.json
git commit -m "Turn on password protection"
git push
While you were typing, the dashboard card flipped from Off to Password not set, and your site started returning 401 for every page. Until you set a password, every request is rejected. The gate is closed and has no key yet.
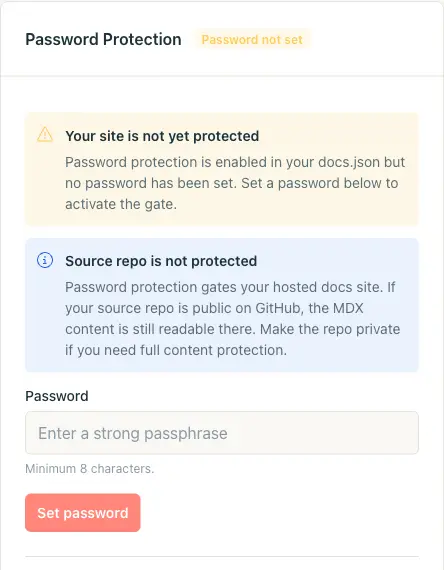
Open Project Settings in the dashboard and scroll to the Password Protection card. Type a strong passphrase (minimum 8 characters), then click Set password.
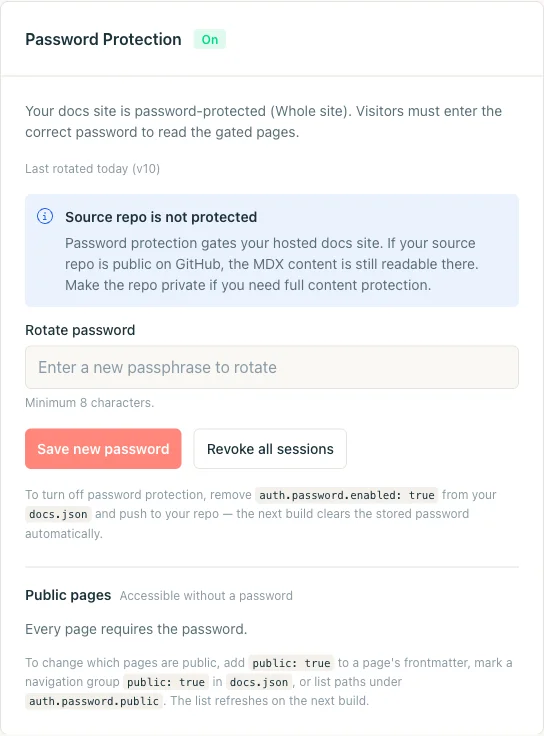
The card flips to the On state. Everyone who has the password can now browse the site; everyone else hits the unlock screen.
Jamdesk never stores your plaintext password. It's hashed with scrypt in the dashboard database and never written to your repo or docs.json. That also means Jamdesk can't email it to you if you forget it. Rotate instead.
Open your docs site in a private browser window (or curl it) and confirm you get the unlock screen. Try a wrong password to check the error state, then the real one to land inside.
# Should respond with HTTP/1.1 401 and the unlock HTML
curl -I https://acme.jamdesk.app/

# Submit the password. On success, sets the jd_auth_<slug> cookie.
curl -i -X POST https://acme.jamdesk.app/jd/unlock \
  -d "password=your-passphrase&from=/"
A successful unlock returns a 303 redirect with a Set-Cookie: jd_auth_acme=...; HttpOnly; Secure; SameSite=Lax; Max-Age=2592000 header. Save that cookie for the next request and you're in.
Public exceptions
Whole-site mode has one escape hatch: you can keep specific pages public even while the rest of the site is gated. This is how you publish a marketing landing page or a signup form alongside private docs.
You've got three ways to mark a page public, and they all merge into the same allow-list on each build.
Frontmatter is the most granular option. Add public: true to any .mdx file and only that page escapes the gate:
---
title: Get started
public: true
---
Navigation groups cover a whole section at once. Set public: true on a group or tab in your docs.json navigation, and every page under it is public. Handy for a "Marketing" tab that sits next to private engineering docs:
{
  "navigation": {
    "tabs": [
      {
        "tab": "Marketing",
        "public": true,
        "groups": [
          {
            "group": "Overview",
            "pages": ["landing", "pricing", "changelog"]
          }
        ]
      },
      {
        "tab": "Internal",
        "groups": [
          { "group": "Runbooks", "pages": ["deploys", "oncall"] }
        ]
      }
    ]
  }
}
Explicit globs under auth.password.public[] handle anything frontmatter and navigation can't: top-level landing pages, dynamically-generated routes, or an entire subtree you'd rather not rewrite.
{
  "auth": {
    "password": {
      "enabled": true,
      "hint": "Ask #docs-access on Slack",
      "public": [
        "/landing",
        "/pricing",
        "/marketing/**",
        "/blog/*"
      ]
    }
  }
}
Globs support * (one path segment) and ** (any depth). A bare / is rejected on validation: if Jamdesk honored it, a single typo could silently unlock your whole site. After each build, the dashboard card shows the resolved allow-list, so you can sanity-check what the build actually picked up.
Protect just a few pages
Specific-pages mode is the opposite workflow: everything is public by default, and you opt individual pages into the gate.
Add private: true to the page's frontmatter. This is the easiest option when the decision lives with whoever owns the page.
---
title: Incident Runbook
description: What to do when the deploys dashboard is on fire.
private: true
---
Or, if you'd rather keep the list of gated paths in one file, add them under auth.password.private[] in docs.json. Both approaches are additive, so you can mix and match.
{
  "auth": {
    "password": {
      "hint": "Ask the on-call engineer",
      "private": ["/admin/runbook", "/internal/api-keys"]
    }
  }
}
Notice there's no enabled: true. Setting auth.password.private[] without enabled is what activates specific-pages mode automatically.
Push your changes. The next build detects the private pages, turns on protection in specific-pages mode, and surfaces the dashboard prompt to set a password, exactly like whole-site mode.
git add content/runbook.mdx docs.json
git commit -m "Gate the incident runbook"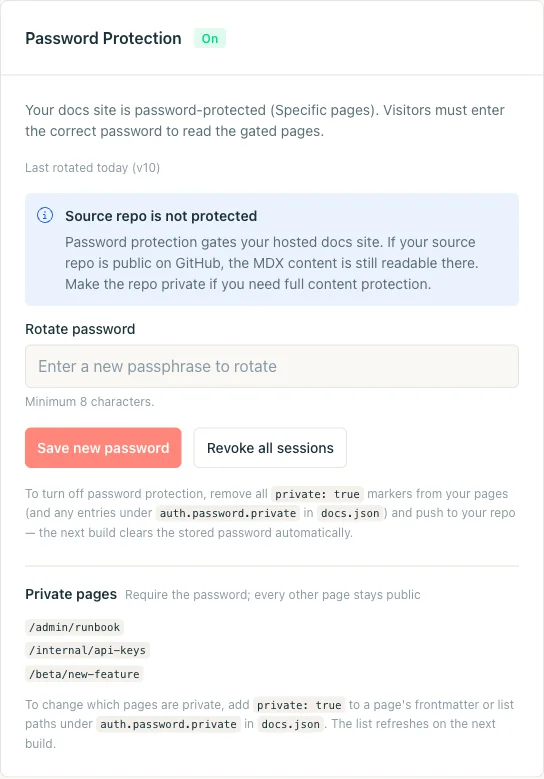
git pushOpen Project Settings, find the Password Protection card, and set a passphrase. The card header now reads On with Specific pages instead of Whole site, and it shows the list of private pages the build resolved so you can audit it at a glance.
Browse your docs site normally. Public pages should load as before; private pages should redirect you to the unlock screen. Once you enter the password, you're signed in for 30 days on that device and can read any private page without typing it again.
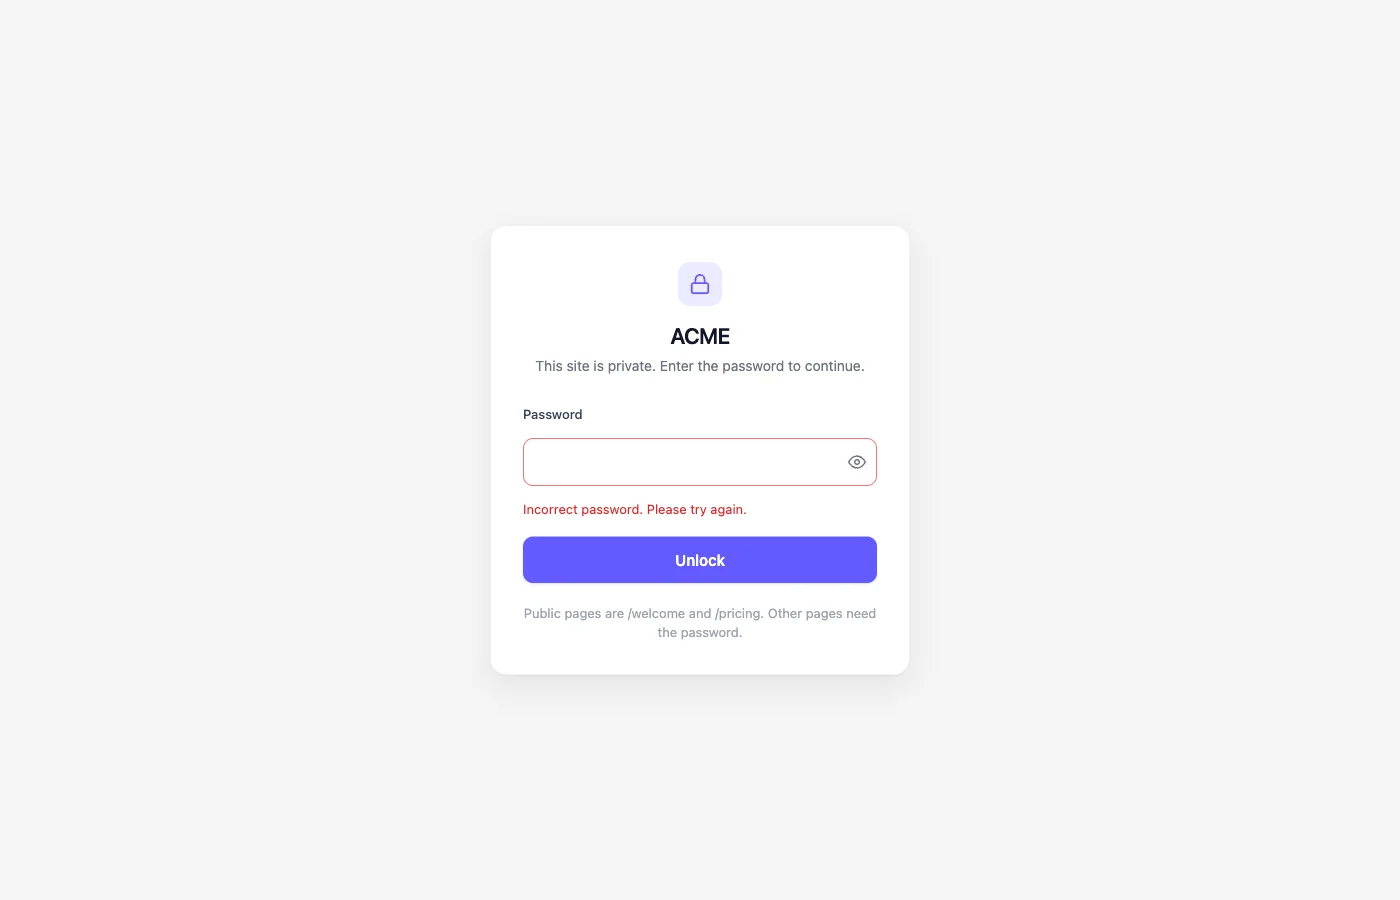
What visitors see
When someone hits a gated page, they get a centered unlock card with no sidebar, no chrome, and no indication of what's behind the door besides the site name and an optional hint.
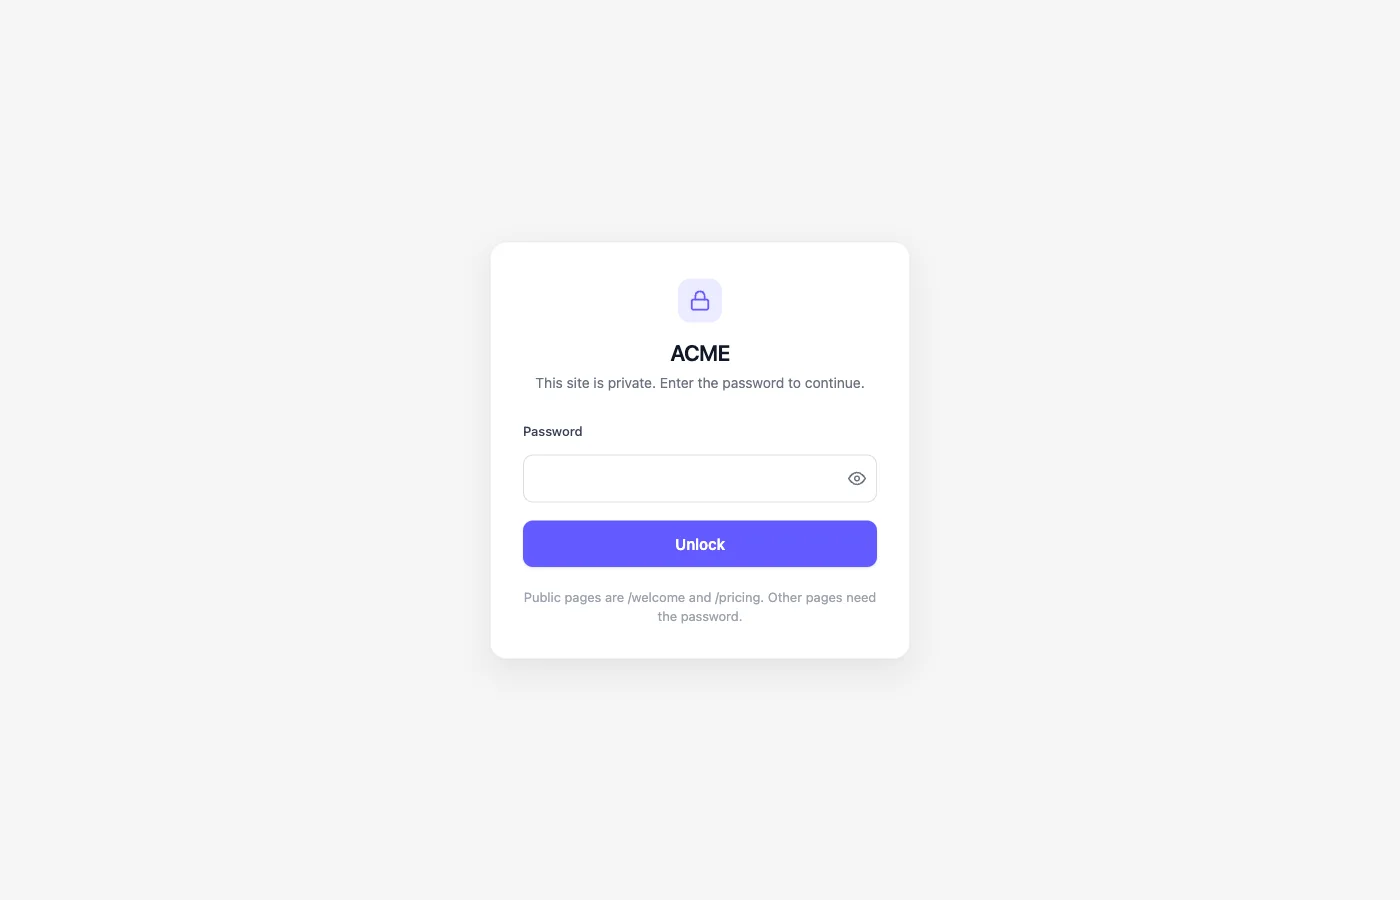
The card is branded with your site's logo and primary color from docs.json. The password field has a reveal toggle and autofocus.
Wrong passwords render the same card with an error message, a fresh input, and a small delay between attempts. An incorrect password and a request without a password both land on the same screen, so nothing on the page distinguishes "password wrong" from "no password entered yet."
Once a visitor enters the correct password, they get a signed cookie and can browse normally until the session expires or you revoke it.
Rotating and revoking sessions
Passwords get shared. People leave. You'll want to change it eventually.
Open the Password Protection card, type a new passphrase in the Rotate password field, and click Save new password. Everyone with the old password is locked out on their next request; everyone with the new password gets in. Rotation takes effect immediately and doesn't require a rebuild.
If you just want to force-logout every active session without changing the passphrase (say, someone's laptop went missing), click Revoke all sessions instead. It bumps a server-side version counter, which invalidates every cookie issued before the bump. Visitors re-enter the current password and get back in.
Disabling protection
Protection is driven by docs.json, so turning it off means editing the file and pushing.
- Whole site: remove
auth.password.enabled(or set it tofalse). - Specific pages: remove every
private: truemarker and clearauth.password.private.
On the next build, Jamdesk deletes the stored password hash and flips the card back to Off. No "dormant" state lingers. If you re-enable protection later, you'll need to pick a fresh password.
Your source repo isn't password-protected. Password protection gates the hosted docs site at *.jamdesk.app (or your custom domain). If your GitHub repo is public, the MDX content is still readable there. Make the repo private if you need full content protection.
Precedence rules
A single page can be touched by several signals at once. The resolution order, from most to least specific:
- If
auth.password.enabledistrue, the whole site is gated.private: trueon individual pages becomes redundant. - If a page is marked both
public: trueandprivate: true, public wins. The safer default is the one that doesn't accidentally leak a page. - Frontmatter
public: true, nav-grouppublic: true, andauth.password.public[]globs all merge into one allow-list. No "most specific wins" rule. If any signal says a page is public, it's public. - If
auth.password.private[]is set butauth.password.enabledis not, Jamdesk activates specific-pages mode automatically. You don't need to do anything else.
How sessions and rate limiting work
Three questions come up with any new auth system.
The session cookie. On a successful unlock, Jamdesk sets a cookie named jd_auth_<slug> (for example, jd_auth_acme). It's HttpOnly, Secure, SameSite=Lax, scoped to the host, and signed with HMAC-SHA256. The payload includes the project slug, the current version counter, and an expiration timestamp, so any tampering fails validation. The default lifetime is 30 days, refreshed on each successful unlock.
Rate limiting. The unlock endpoint applies two counters per hour: 10 attempts per IP and 100 attempts per project. Both are enforced before the scrypt hash check so a brute-force attempt can't burn CPU or leak timing information. Hitting either limit returns 429 Too Many Requests with a Retry-After header.
Storage. Your password is hashed with scrypt and stored in the dashboard's Firestore. It never lands in your repo, your docs.json, or a build artifact. If you lose it, rotate. No recovery path exists.
Testing during local development
jamdesk dev runs your docs against the live R2 content and live config. Password protection is not enforced in the local dev server, so you can preview gated pages without knowing the password. This is deliberate: you're the author, you already have the keys to the repo, and blocking the local preview on a password wall would be friction for no security benefit.
If you want to verify the actual gate, hit the deployed site at <slug>.jamdesk.app (or your custom domain) from a browser window that doesn't have the cookie yet.
Troubleshooting
The dashboard card is probably showing Password not set. Protection doesn't activate until you've both (1) pushed the config to docs.json and (2) set a password in Project Settings. Until the second step completes, every request returns 401 with the unlock screen as the body, which can look like the screen "not appearing" if you were expecting a specific destination.
Their browser has an old jd_auth_<slug> cookie from before you rotated. Either wait 30 days for the cookie to expire, click Revoke all sessions in the dashboard, or have them clear cookies for the docs domain. They'll be prompted for the current password on their next visit.
Not directly. Jamdesk uses a single shared password per site. If you need per-group access, split your docs into multiple projects (each with its own password) or use specific-pages mode with separate public/private boundaries per audience.
Yes. The unlock cookie is host-bound, so each host (the *.jamdesk.app subdomain and your custom domain) authenticates independently. Readers who unlock one host won't be pre-authenticated on the other.
No. Protected sites set noindex, nofollow on the unlock screen and return 401 for every gated page, so search crawlers can't index anything behind the gate. Public pages inside a protected site are still indexable normally.